
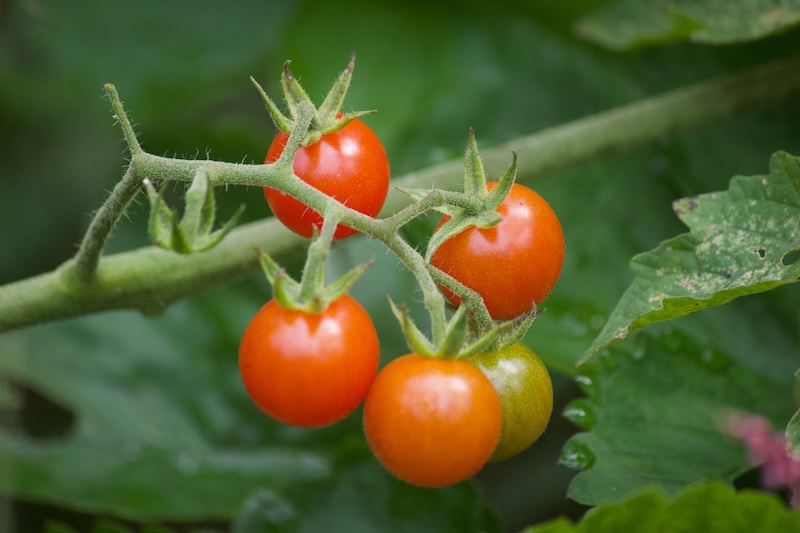
There’s nothing like a vine-ripened tomato fresh from the garden. I’ve spent years growing my own food, and I come back to tomatoes every season.
While it’s always tempting to grab seedlings from the local garden center, I’ve found that starting tomatoes from seeds is far more rewarding. It gives you access to a much wider variety, saves you money, and produces healthier, more productive plants.
To put this guide together, I grew a fresh batch of tomatoes from seed step by step and documented every stage with my own photos, so everything here comes straight from my garden.
The good news? You don’t need a green thumb or fancy equipment to learn how to grow tomatoes from seeds. A few basic supplies and the steps below will set you up to grow thriving tomato seedlings for your garden beds or containers.
Quick Overview: What to Expect
- Start seeds indoors: 6–8 weeks before your last frost
- Germination time: 5–10 days in warm soil (70°–85°F)
- Transplant outdoors: After all danger of frost has passed
- First harvest: 55–100 days after transplanting
How to Grow Tomatoes From Seeds
Learning how to grow tomatoes from seeds is easier than you think — if you get the timing right.
Tomatoes are tender, warm-season crops, but they need a head start on summer. Sow your seeds indoors 6 to 8 weeks before your last frost date.
Why indoors? Tomatoes need that long head start to produce well, but they can’t survive frost or cold soil. Starting seeds inside lets you give young plants those critical early weeks in a warm, protected spot while it’s still too cold to plant outdoors.
For many gardeners, starting tomatoes indoors is the most practical and reliable way to grow them from seed. (Gardeners in very long, hot-summer regions can sometimes sow seeds directly in the garden, but most climates don’t have a long enough season.)
Not sure when that is? Look up your USDA Hardiness Zone to find your area’s winter lows and first and last frost dates. Timing your planting correctly is critical for a successful harvest.
Below, I’ll teach you how to grow tomatoes in pots or containers (or your backyard garden like me):
Step 1: Choose the Right Tomato Seeds
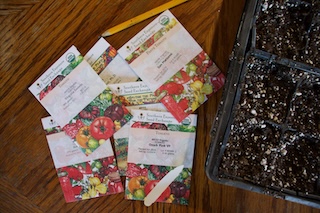
Once you start growing from seed, you’ll have access to hundreds of varieties. Here’s how to narrow it down.
Match the Tomato Variety to How You’ll Use It
- Slicing tomatoes (midsize and beefsteaks): Best for salads and sandwiches
- Paste and Roma tomatoes: Dense, meaty flesh that’s perfect for sauces
- Cherry and grape tomatoes: Great for snacking
Varieties come in pink, yellow, red, green, dusky purple, and even bi-colored, with flavors ranging from sweet and smoky to bright and tangy.
But it’s worth thinking beyond flavor and appearance. Before settling on a variety, I always weigh the three additional factors below.
Consider Disease Resistance for Your Climate
Before choosing a tomato variety, consider other factors like disease resistance.
Different diseases trouble different climates, so match the variety to where you garden. Seed packets note resistance with shorthand codes.
For example, “FW” means resistance to Fusarium wilt, “EB” to early blight, and “LB” to late blight. Blight resistance means a variety is bred to better withstand the fungal diseases that cause spotted leaves, rot, and crop loss; resistant doesn’t mean immune, but it’s far less likely to succumb.
Early blight and Fusarium wilt favor warm, humid weather and are bigger concerns in hot regions like the Southeast and Gulf states, while late blight thrives in cool, damp conditions and is more common in the Northeast and the Pacific Northwest.
Check the Days to Maturity
Days to maturity is the number of days a variety typically takes to go from transplanting outdoors to its first ripe fruit (but it does not count the weeks your seedlings spend growing indoors).
This number matters most if you garden in a cool, short-season climate, like the Upper Midwest, New England, or mountain regions. A short season means choosing faster-maturing varieties so the fruit has time to ripen before the first frost.
Consider Determinate vs. Indeterminate Tomatoes
Most tomatoes are indeterminate, meaning they keep growing and producing fruit over a long season.
Determinate varieties are smaller and produce all their fruit over a short window — these are ideal for container gardeners or anyone planning to preserve a large batch at once.
Choose a Tomato Plant Size That Matches Your Space
Tomato plants vary widely in size, so pick one that fits where you’ll grow it. If you’re growing tomatoes in containers or pots, choose dwarf, bush-type, or determinate varieties.
Step 2: Gather Your Supplies
I’ve broken your tomato-growing supply list into two phases. The first one covers what you’ll need to start your tomato seeds indoors and the second what you’ll need when you transplant them outdoors.
Phase 1: Supplies for Starting Tomato Plant Seeds Indoors
- Containers with drainage: Look for seedling trays or small containers that offer good drainage, or make some small holes in the bottom yourself. Alternatively, you can also use biodegradable seed-starting trays, newspaper pots made from folded newspaper, or a soil blocker and trays.
- Quality seed-starting mix or potting soil: One of the most important purchases you’ll make is a quality seed-starting mix or potting soil. These typically contain a mix of ingredients like vermiculite and peat moss, which create a light, fluffy soil perfect for tender new roots. They also retain nutrients and drain better than plain garden soil. I enjoy growing tomatoes organically, so I typically purchase Fox Farm Happy Frog Potting Soil or PRO-MIX BX All Purpose Growing Mix, but there are many other options.
- A light source: Tomatoes are light-hungry, warm weather loving plants. To start them indoors, you’ll need to mimic their outdoor habitat. For most people, this will mean providing some supplemental light. You can purchase grow lights, but the long garage or shop light LEDs are often a much more affordable option that fits conveniently over seed trays. If you can’t use lights, you’ll need a south-facing window that lets in plenty of light.
- Gentle watering tool: You’ll need a good watering can that has a gentle shower head that won’t disturb the soil and seeds. You can also use a spray bottle.
Phase 2: Supplies for Moving Your Seedlings Outdoors
Once your tomatoes are ready to move outdoors, you’ll need a few other supplies depending on whether you’re growing them in a garden bed or growing tomatoes in pots.
- Larger pots (for a container garden): Select pots that hold at least 5 gallons of soil and have drainage holes. To fill the containers, I like to use a mix of 2/3 potting soil and 1/3 finished compost or aged manure. The potting soil will prevent compaction, and the compost or manure adds extra nutrition.
- Compost or aged manure: Compost or aged manure is also handy for garden beds. Adding a couple of inches of finished compost to the top of the bed is a great way to give your plants a boost.
- Fertilizer: Another way to support your plants is with fertilizer. When growing tomatoes organically, I like to use a liquid fertilizer like fish emulsion or liquid kelp. If you’re using traditional fertilizer, look at the three-digit number on the package, for example, 3-4-6. These numbers stand for the nitrogen (N), phosphorus (P), and potassium (K) in a fertilizer. At planting, a balanced ratio like 10-10-10 is often ideal to promote root and foliage growth. Later, a fertilizer like the 3-4-6 with more phosphorus and potassium and lower nitrogen will support fruit production. Too much high-nitrogen fertilizer can limit fruit production.
Tip: Avoid using plain garden soil for seed starting. It’s too dense, drains poorly, and may carry pathogens.
Step 3: Plant Your Tomato Seeds
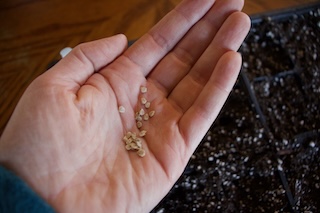
Now it’s on to the fun part!
First, moisten your potting mix if it’s dry, then pack containers so there are no air gaps.
Next, sow the seeds about 1/4 inch deep. To sow simply means to place, or drop, your seeds into the soil.
A pencil makes this easy. Use the tip to poke a shallow hole at the right depth, drop in a seed, and move on to the next. As you can see in the image below, I do this when planting seeds and it works well.
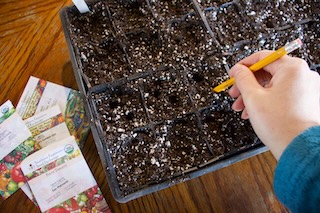
If you have large containers, you can sow more than one seed in each and divide the seedlings later. You should also sow more than one if you’re using old seed that may have a poor germination rate.
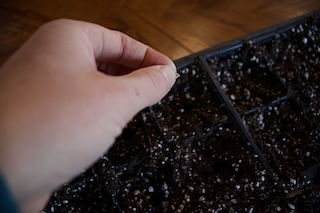
Cover the seeds with soil and gently press down. Good seed-to-soil contact is essential for germination.
Water gently with your watering can or spray bottle. Keep the soil moist but not soaked while the seeds are germinating.
Keep the soil warm. Tomato seeds germinate best when the soil is between 70° to 85°F. If you have a cool house, you can purchase a seedling heat mat to place under your tray or pots.
In ideal conditions with warm, moist soil, your tomato seeds will germinate in 5–10 days. If you look closely at my photo below, you can see the plant is starting to sprout.
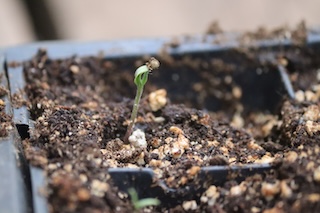
However, in cool soil, it can take over 14 days for seeds to germinate.
Step 4: Care for Your Tomato Seedlings
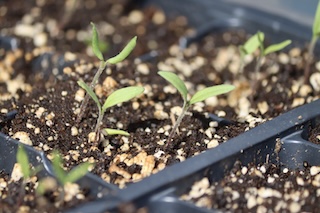
To grow healthy seedlings, you’ll need to provide your tomatoes with adequate light, water, nutrition, and airflow.
Light
As discussed above, tomatoes need plenty of light. Many growers find that a window alone isn’t adequate.
If tomatoes don’t receive enough light, you’ll find they get “leggy” or grow tall and spindly.
- When using grow lights or shop lights, it’s easiest to set them on a timer so they stay on for 14–16 hours each day.
- For best results, you want these lights about 2 inches above the tops of your seedlings. You can raise them as the plants grow.
- Hanging them from a wire shelf on adjustable chains is a great way to set this up.
Water and nutrition
Potting soil is great for getting plants started, but may not contain adequate nutrition as they begin to grow.
- Fertilize lightly when seedlings develop their first set of true leaves. Cotyledons are the smooth, rounded seed leaves that emerge first to feed the young plant. The true leaves appear afterward and resemble mature tomato leaves. Dilute a traditional liquid fertilizer or use an organic fertilizer like fish emulsion or liquid kelp.
- Watch for signs of nutrient deficiency: Yellow leaves are a sign you need to fertilize the plant. Purple leaves may indicate a phosphorus deficiency, but can also occur when seedlings get too cold.
Airflow
Airflow is another important feature for tomatoes.
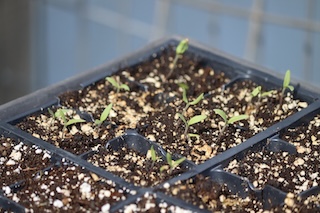
Good airflow helps simulate the wind plants will experience outdoors and helps reduce the risk of fungal diseases like “damping off,” which can kill your young plants. Using a fan on low near your plants is ideal.
Potting up
Once your plants have developed several sets of true leaves, you can pot them up into larger containers.
Typically, I start plants in seedling trays and then move them to 3-inch pots at this stage. If you have multiple tomatoes per cell, this is a great time to thin them. Gently tease apart the roots and plant each in its own container.
Common seedling problems to watch for
- Damping off: The biggest threat to young tomato seedlings indoors is fungal diseases like damping off, which is caused by a few different types of fungus. This generally occurs when your soil is too damp or your plants don’t have adequate airflow. Unfortunately, the fungus can also live on gardening tools and equipment, so you should sanitize your containers each year if you’re going to keep using them.
- Aphids: Pests aren’t usually an issue with indoor tomato seedlings; however, you might see aphids, especially if you have other plants that are carriers. Aphids are tiny, soft-bodied, green, pink, or black insects you’ll find on the tomato stems or on the underside of the leaves. Thankfully, they’re easy to take care of. You can spray them off the plants with water and rinse them down the sink, or spray the plants with insecticidal soap.
Step 5: Harden Off and Transplant Outdoors
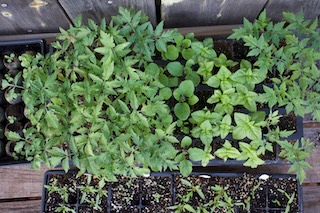
Your seedlings are used to the cushy life you’ve given them indoors. Without preparation, they won’t handle the intense sunlight, fluctuating moisture, and wind in your garden. This adjustment period is called hardening off.
How to harden off tomato seedlings
- To harden off your seedlings for transplanting, start by moving them outdoors for just an hour or two.
- Over the course of the next 7–14 days, slowly increase the time until the plants can handle a full day outdoors.
- During this period, you also want to let the seedlings dry out a bit more. You don’t want to let them get completely dry and stunt the plants, but you don’t have to keep them constantly moist anymore.
- You can also stimulate wind by using a fan and running your hand gently over the tops of the plants.
When and Where to Transplant
Transplant your seedlings into the garden or large containers after all danger of frost has passed in your area. Ideally, the average soil temperature in the garden should be up to 60 to 65°F by the time you transplant.
They may look small as seedlings, but tomatoes are large plants that need plenty of room. Depending on the size of your variety, plant your tomatoes 2 to 4 feet apart in rows 3 to 5 feet apart.
It’s tempting to squeeze more plants in, but this can actually result in a reduced harvest. Too many tomatoes will compete for light, water, and nutrients. They can also crowd each other and reduce airflow, which can contribute to fungal diseases like late blight.
How to Transplant
To transplant your tomatoes, dig a hole larger than you think you’ll need to help loosen the soil. If you have some on hand, you can mix in a bit of compost, aged manure, or fertilizer into the hole. If you’re using granular fertilizer, mix it in very well to avoid burning the plant’s roots.
Plant tomatoes deeply, burying the stem so that the first set of true leaves is just a couple of inches above the soil. The buried section of the stem will grow additional roots, helping the plant get off to a good start.
Water your tomatoes well and mulch around them with straw, old leaves, wood chips, or grass clippings. This mulch will help reduce weed pressure and keep water from splashing up on the plant’s leaves.
Prevent Soil-Borne Disease
Many tomato fungal diseases are soil-borne, meaning that they can be transferred to the plant when the soil splashes up onto the plant’s leaves.
Mulch can help prevent this, but you can also prevent this with your watering technique. If you’re hand-watering, just water the base of the plant, or you can use a system like irrigation or soaker hoses.
Support Your Plants
Most tomato varieties also require support. Trellising your tomatoes (like I did in the photo below) will improve airflow and keep the fruit off the ground.
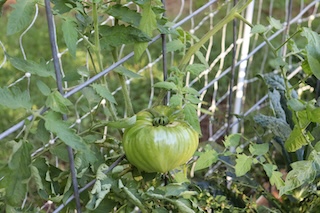
You can use heavy-duty stakes, a wire trellis, tomato cages, or a combination of fence posts and woven rows of twine in a method called the “Florida weave” to support your plants. Whatever method you choose, it’s best to get it set up early; it’s tough to tie heavy plants to a trellis.
About tomato cages: Traditional tomato cages from a hardware store usually aren’t big enough for most indeterminate tomato plants and will collapse under the weight. However, I’ve seen some great homemade cages made from small sections of fencing.
Step 6: Harvest Your Tomatoes
After transplanting, most tomatoes will begin fruiting in 55 to 100 days. When your tomatoes are ripe, they will have a vibrant, glossy color that may be red, yellow, orange, purple, or green, depending on the variety you chose.
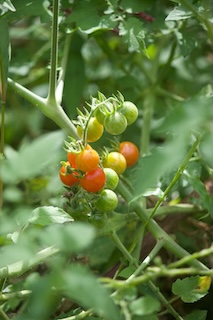
The tomatoes should also feel slightly tender, and should be easy to pick from the vine with one hand. If it’s tough to get a tomato off, it’s not ripe yet. Ripe tomatoes also have a noticeable fragrance if you put your nose to the fruit, while unripe fruit lacks fragrance.
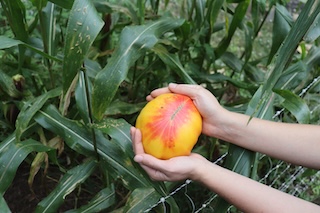
Once your tomato starts fruiting, indeterminate varieties will continue fruiting until the plant dies from frost or another disease issue. Check your plants for ripe tomatoes and harvest them often.
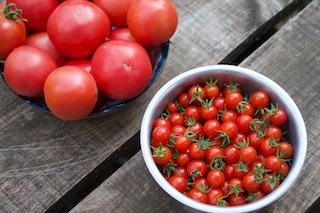
Leaving tomatoes to rot on the vine or below the plants can contribute to pest and disease issues, so it’s best to keep up with regular picking.
FAQs About Growing Tomatoes From Seeds
Can you plant tomato seeds straight from the tomato?
You can, but it’s not the most reliable approach. Seeds scooped straight from a fresh tomato are coated in a gel that inhibits germination, so they’re best fermented and dried before planting.
There’s also no guarantee they’ll grow true to the parent — many supermarket and hybrid tomatoes produce seeds that grow into unpredictable plants. For consistent results, it’s better to start with quality seed from a reputable source.
What are common tomato growing mistakes?
A few mistakes trip up new tomato growers most often: planting too early before the soil has warmed, crowding plants so they compete for light and airflow, overwatering, and skipping plant support until the vines are already heavy.
Watering from overhead instead of at the base is another common one — it splashes soil onto the leaves and spreads fungal disease.
What are common seed starting mistakes?
The most common seed-starting mistakes are starting seeds at the wrong time, not providing enough light (which causes leggy, spindly seedlings), keeping the soil too wet, and using plain garden soil instead of a quality seed-starting mix.
Poor airflow is another — it encourages damping off, a fungal disease that can quickly kill young seedlings.
Can you grow tomatoes indoors year-round?
Some gardeners may want to keep their tomato plants indoors year-round, but this requires some extra work. You’ll need to start with a compact variety and use strong grow lights that provide 14 to 18 hours of light each day.
As there are no bees indoors, you’ll also need to hand-pollinate your plants to get any fruit.
How far apart should I space tomato plants?
Space tomato plants 2 to 4 feet apart in rows 3 to 5 feet apart, depending on the variety’s size. Crowding plants reduces airflow and makes them compete for light, water, and nutrients, which can actually shrink your harvest.
Can you grow tomatoes in the summer?
Yes — summer is prime tomato season in most climates, since tomatoes are warm-season plants that thrive in heat. The key is timing: seeds are started indoors in late winter or early spring and transplanted outdoors after the last frost, so plants are established and fruiting through the summer months.
In very hot regions, extreme heat can temporarily slow fruit set, but tomatoes are still very much a summer crop.
